Getting Started
Overview, Objectives, and Key Terms
In this lesson, we’ll walk through the installation of, access to, and use of Python.
Objectives
By the end of this lesson, you should be able to
- access Python on departmental machines (or your own machine)
- define variables using basic Python types
- explain what a variable is
Key Terms
- interpreted programming language
- compiled programming language
- integrated development environment
- Spyder
- Jupyter notebook
- variable
intfloatstrbool- assignment
Overview of Python
Python is a scripting language, which means it is interpreted and not compiled. Interpreted languages are converted from human-readable text files to binary (i.e., the 1’s and 0’s a computer understands) on-the-fly. That makes the cycle of changing a program, running it, correcting the program for errors, and re-running it much, much faster than with compiled languages. A compiled language, on the other hand, is converted to binary once-and-for all by an explicit compilation step. That step makes rapid changes a bit more painstaking to implement. Learning to program is so much easier without this step, and many of the problems we need to solve don’t really require the added computational performance that compiled languages provide.
Several versions of Python are in current use, but the most popular versions are 2.7 and 3.7. Despite the numbering, both versions are current (but not forever). In this class, we will work exclusively with Python 3.X (the X is currently 7 and may change over time).
Python Distributions
In addition to various versions of Python, there are many distributions of Python. By distribution, I mean a collection of the Python interpreter (which is what executes the code you write), editors, and/or packages for performing specific tasks. Here, we’ll be using Conda, which provides a very easy way to manage Python and its packages on Windows, Mac OS/X, and Linux machines. Currently, a full version of Conda is installed on the departmental machines and represent everything you need for this course.
For folks who want to install Python on their own machines, you may install the same Anaconda package on the MNE machines. Note, the file is pretty large. Be sure to select the latest version (3.7 as of 5/25/19) appropriate for your operating system.
Accessing Python
For folks working on MNE machines, the following is a quick overview of getting access. You will need to make time to visit one of the labs (or to install Python on your own machine) to follow along with examples in this and all future readings.
Finding CMD
Press windows+r (the Windows key and the r key at the same time)
to open Run.
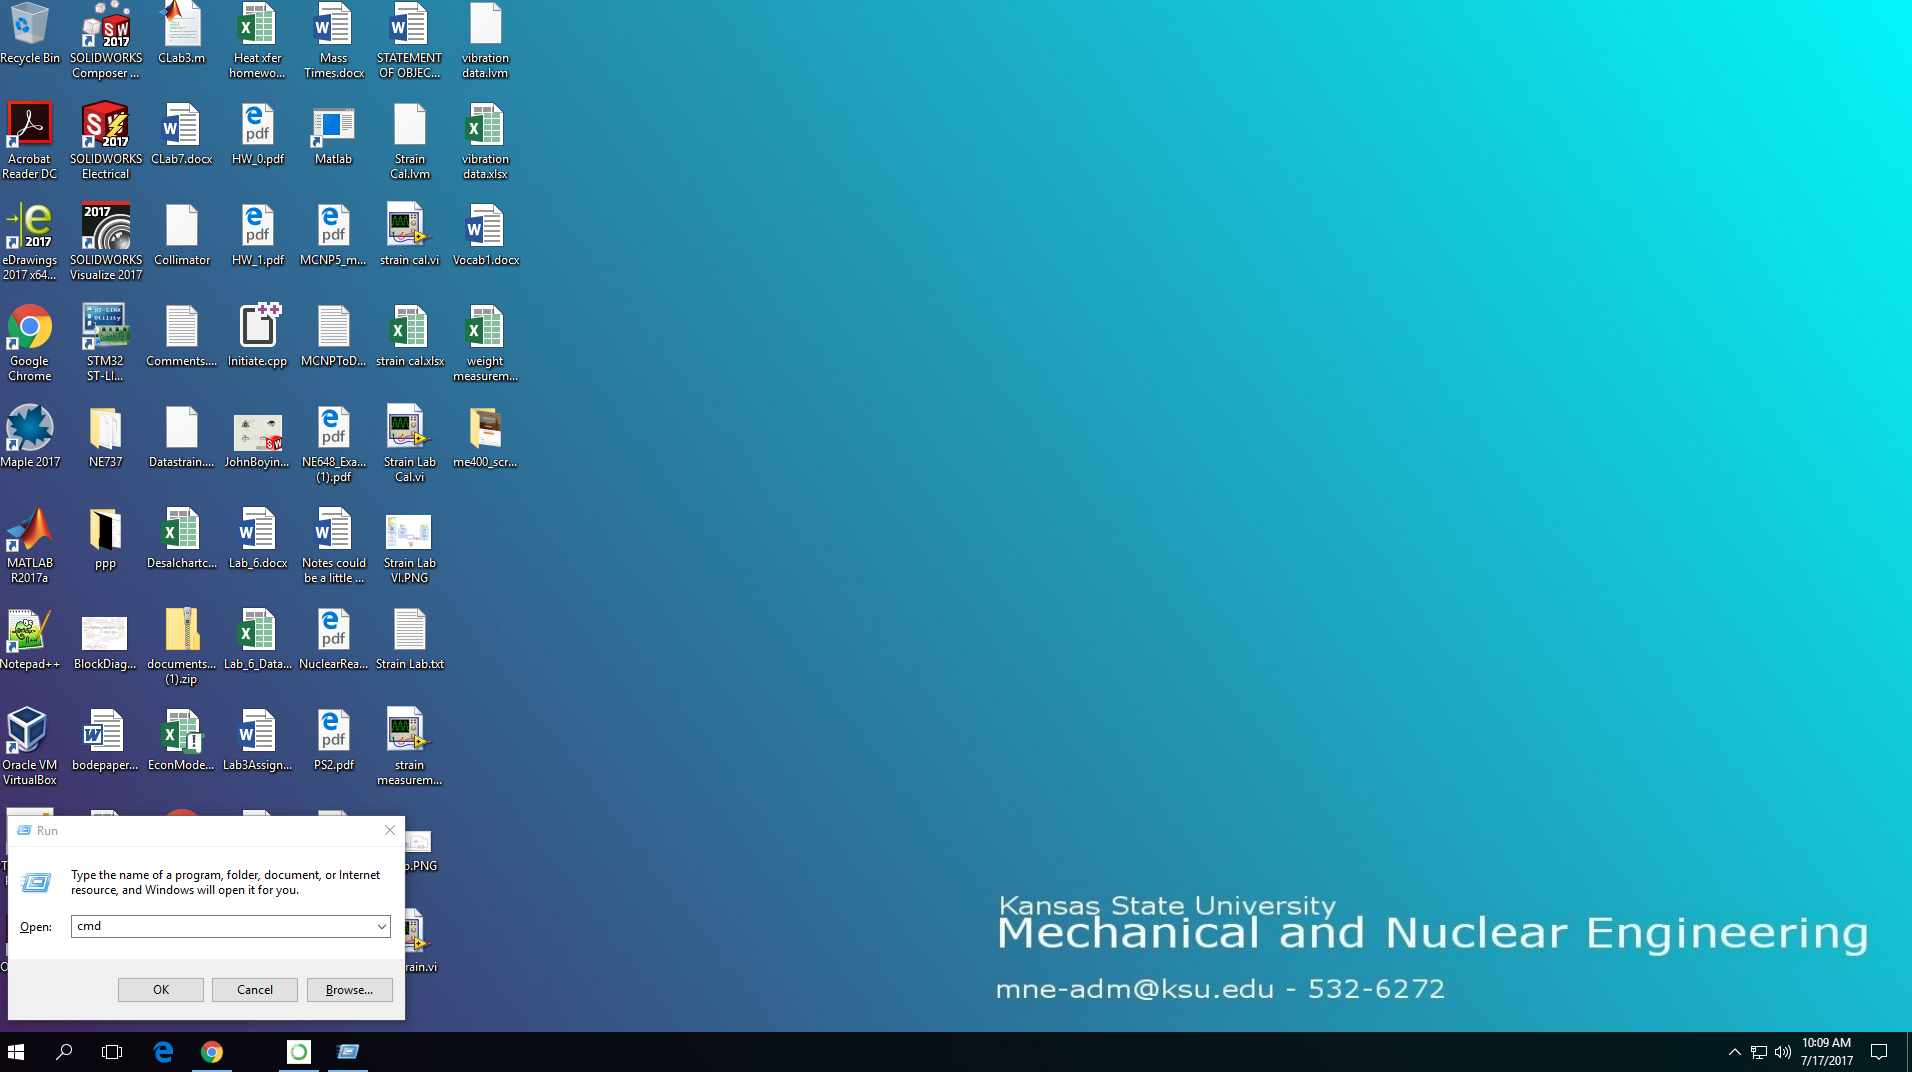
Finding CMD
Interactive Python via IDLE
In the CMD window, type “python” and press enter to open Python.
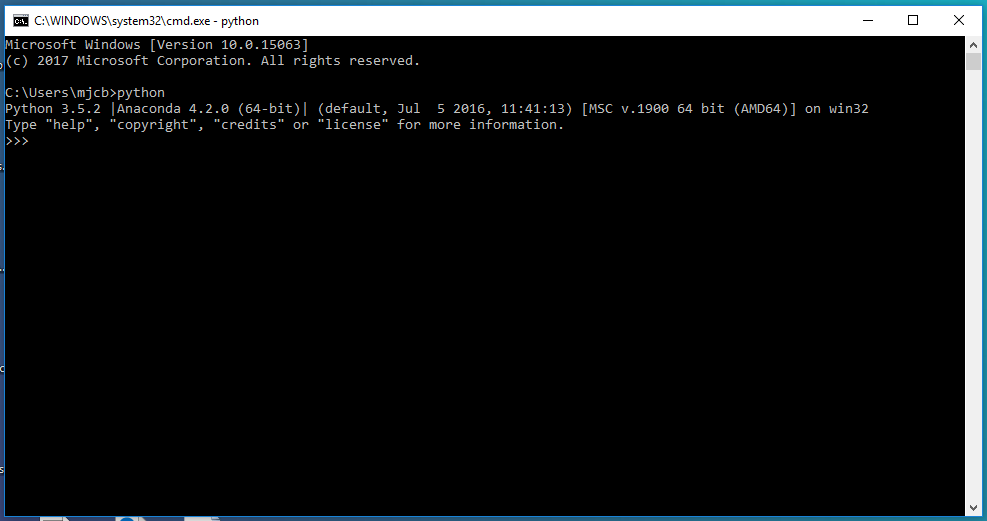
Finding CMD
You should see some information about the Python build (which, in this
case, uses the version Python 3.5.2). You will also see the traditional
marker >>> followed by a (possibly blinking) cursor. It’s here that
you can enter single lines of Python code. Type the following and press
enter:
>>> print("Hello, world!")
What happens?
This particular interface to Python is called the Integrated Development and Learning Environment (IDLE). An alternative (that we’ll also see in Spyder below) is IPython, which can be used by typing “ipython” in place of “python” in your original CMD window.
Spyder
The primary way that I would recommend using Python for anything but the smallest tasks is by using Spyder, an integrated development environment. Unlike IDLE, which is based entirely in the terminal window, Spyder provides a complete environment that incorporates a text editor (for writing complete Python programs), a variable explorer (we’ll see that that means later), and a Python terminal (either IDLE or IPython), among other features.
To access Spyder, type “Spyder” into the CMD window and press enter.
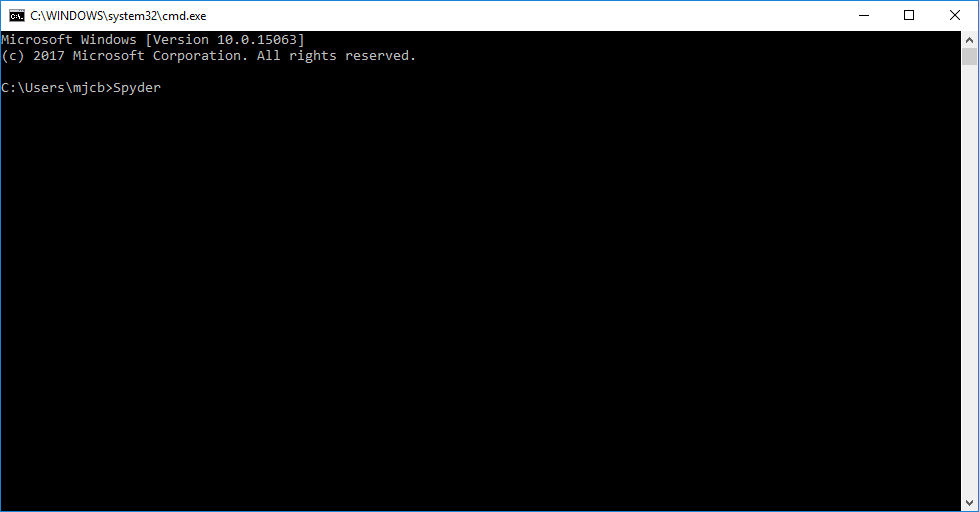
Opening Spyder
You should see something like the following:
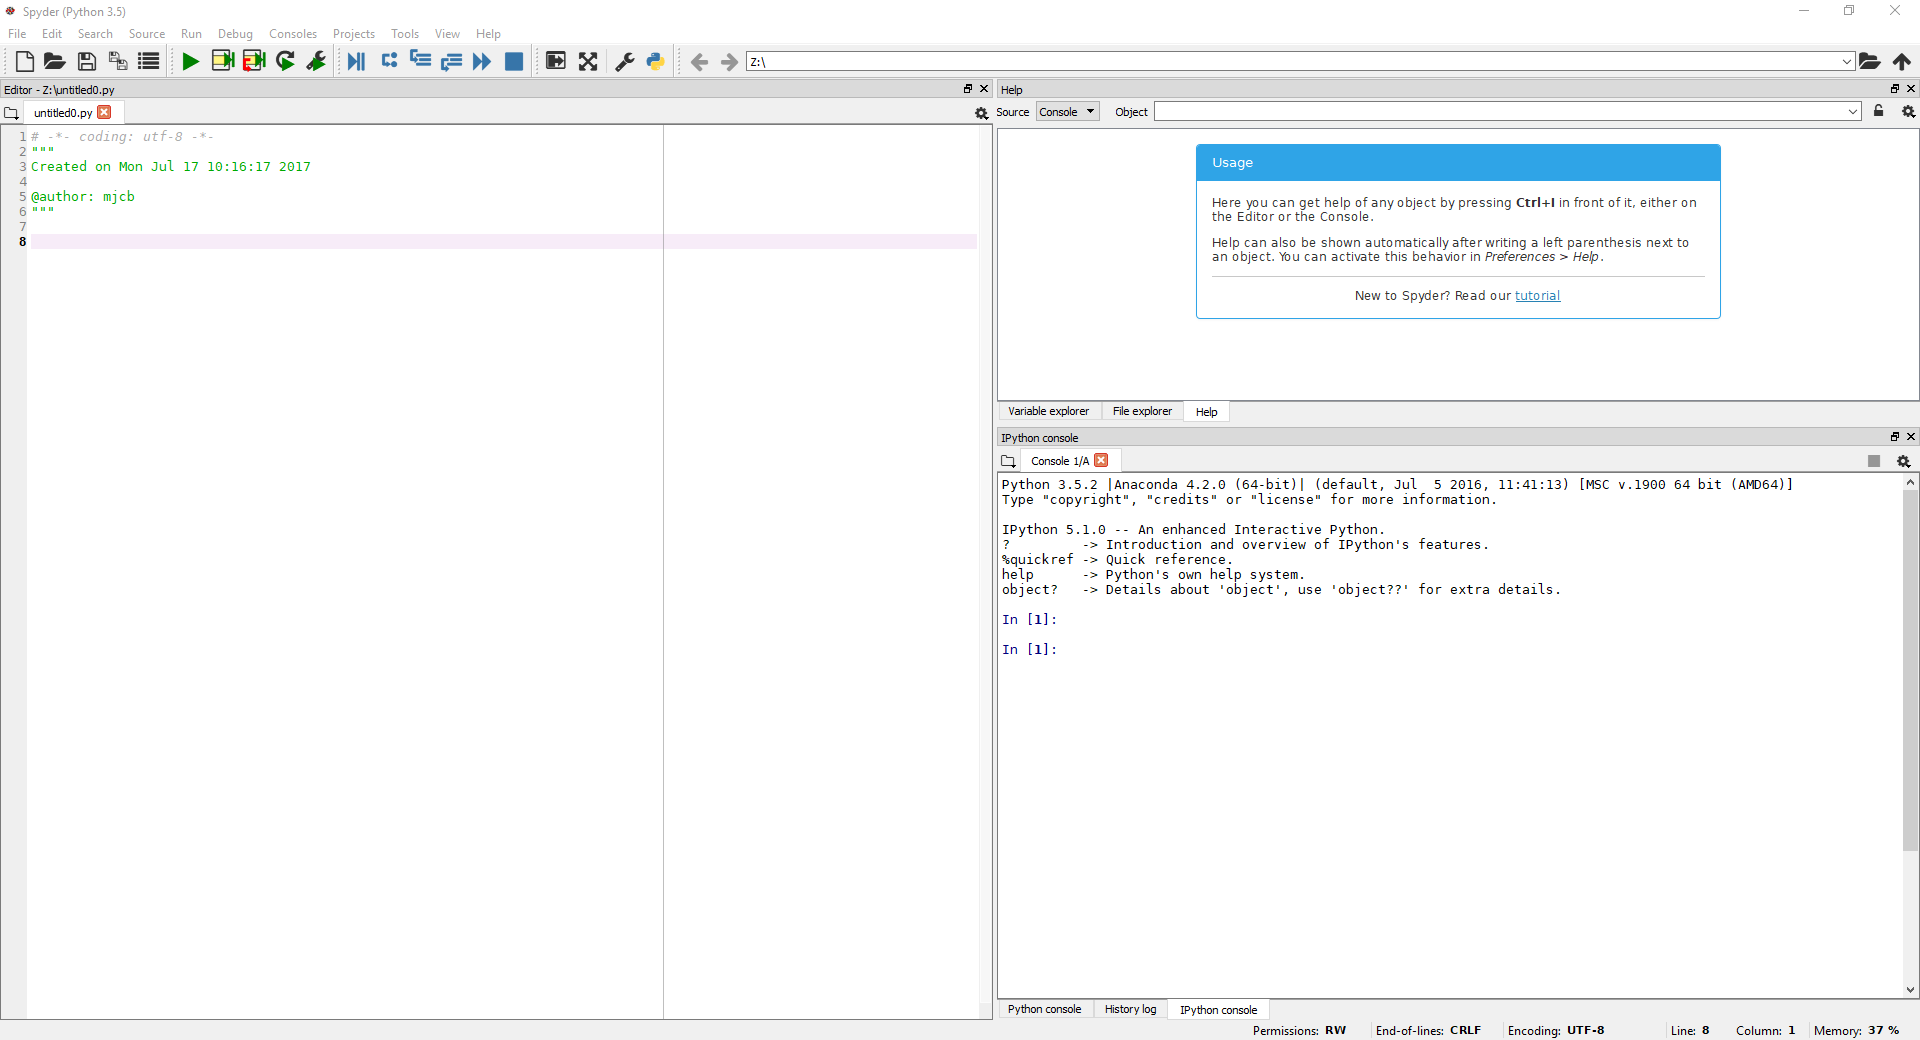
Spyder interface
To the left is the text editor. To the upper right is a tabbed pane that defaults to a Help menu. Notice one of the other tabs is “Variable explorer.” Finally, the lower right pane contains the IPython console.
Jupyter Notebook
Another way to interact with Python is through use of Jupyter notebooks. Jupyter allows one to produce documents within a web browser that contain text, images, links, and, of course, Python code. In fact, these online materials were all produced using the notebook format and converted to the form you are now seeing!
To fire up Jupyter, just type “jupyter notebook” in the CMD window and press enter.
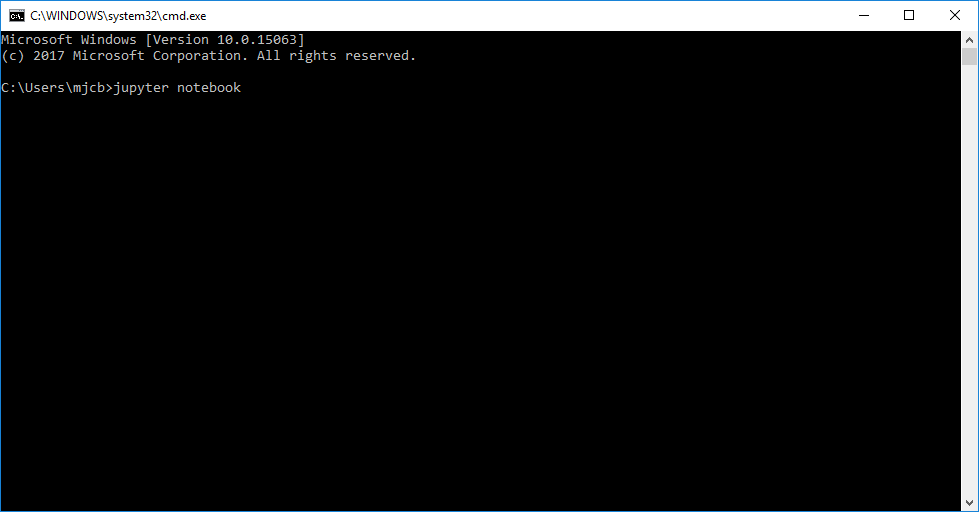
Starting Jupyter
You should see something like the following:
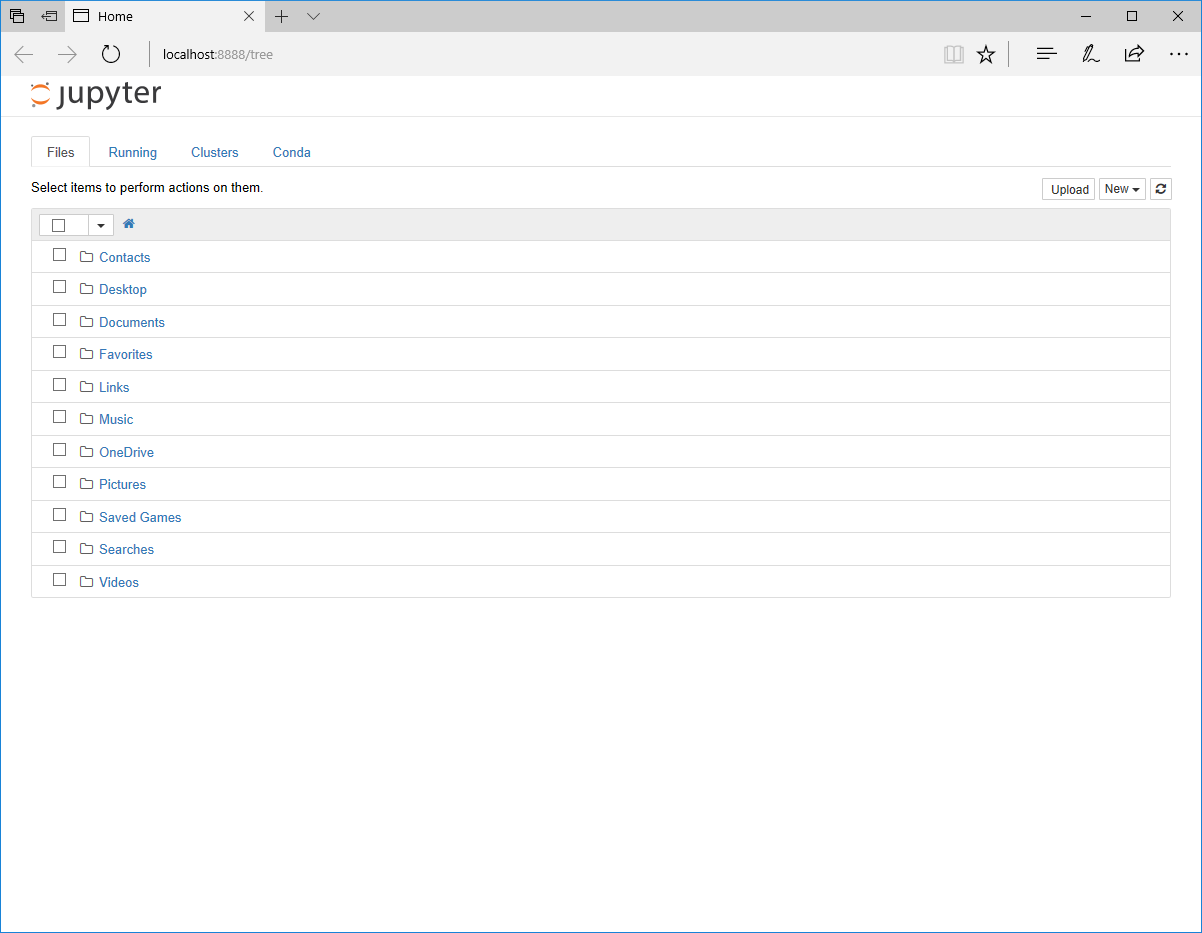
Jupyter interface
You should recognize the listed items: they are the various folders in your home directory. Now, let’s make a new notebook. First navigate to whichever directory you want to contain the file (here, that’s the Documents folder). Then click the “New” icon in the upper right and select “Python [default]”, as shown below:
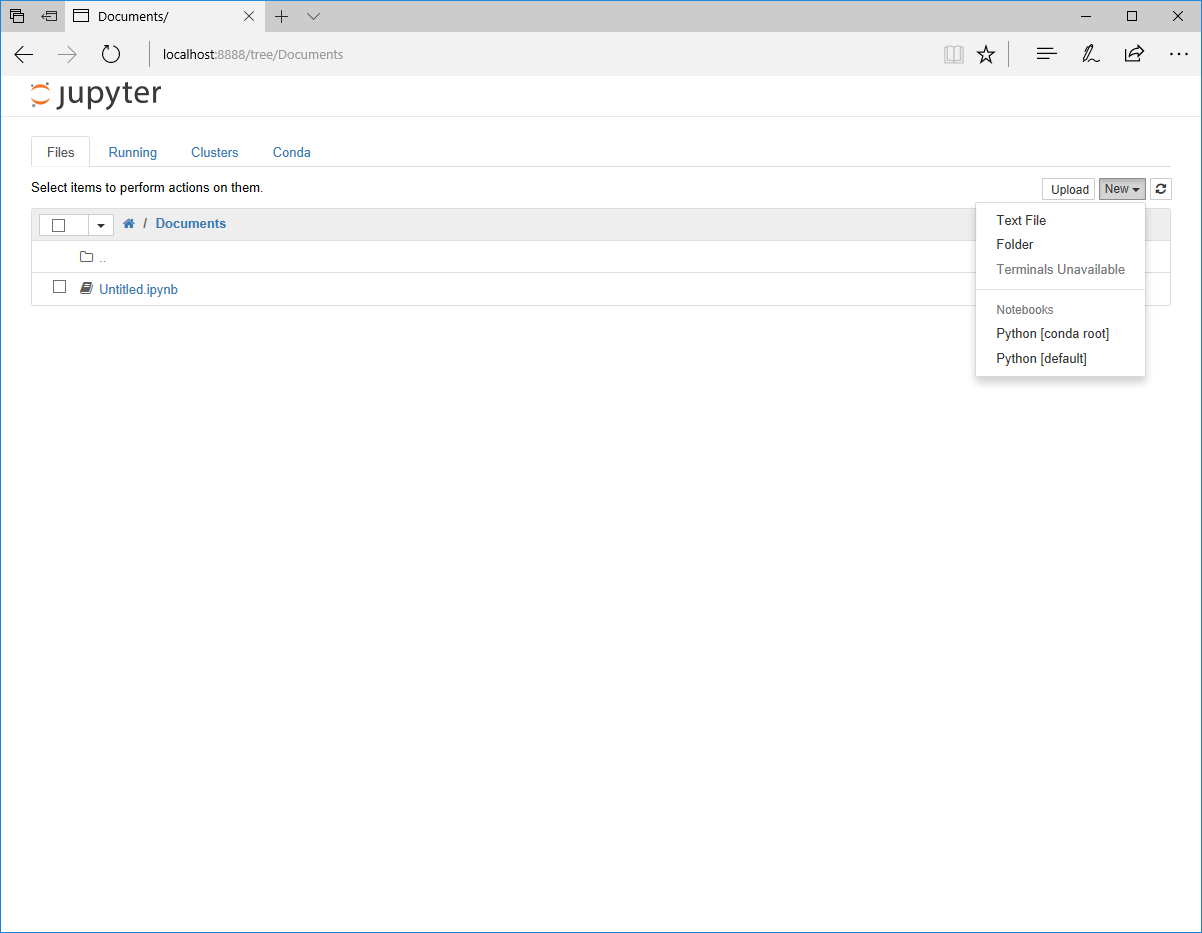
Creating a Notebook
What you get should look like the following:

Notebook interface
Basic Types
For the rest of this lesson, we’ll take a look at the various data types
one can use in the Python language. These types range from the simple
int and float numerical types, to the flexible container types
list, tuple, and dict. Certainly, we’ll encounter other
types as we go on (and we can even define our own types with classes),
but an understanding of these basic types is essential for getting the
most out of Python.
Python, like every other language I’ve used, uses variables, which consist of a name to which a value can be assigned. For example, consider the following lines of Python code:
In [1]:
x = 1
In [2]:
y = 1.0
In [3]:
z = '1.0'
In [4]:
z = float(z)
The names x, y, and z are each assigned values that look
pretty similar (they all appear equivalent to unity). However, the
type of each of these values is different. For instance, x in this
case is an int, i.e., and integer value.
Because the value assigned to y explicitly includes a decimal point,
its Python type is float, i.e., a
floating-point
value. We’ll skip the details, but the floating-point system used by
Python (and many other languages) approximates the real number system
(including 1.0, 1.1, 3.14159..., etc.) with a finite set of numbers
defined between predefined minimum and maximum values.
The addition of quotes in the first value assigned to z makes it a
str, i.e., a string value. Note, strings can be defined using either
single quotes ' or double quotes ", but the pair must match. In
other words, '1.0' and "1.0" are fine (and equivalent), but
'1.0" and "1.0' are invalid.
The second value assigned to z used the built-in function
float(), which converts whatever is passed to it (here, z) into
a float. In this particular case, the final value of z is equal
to y.
As a final example, consider the following:
In [5]:
b = True
Here, b is a bool.
Boolean variables
have one of two values: True or False.
Warning: The value of aboolis eitherTrueorFalseand the capitalization is required
All five examples above use the assignment
operator,
i.e., a single = (equal sign). This “operation” takes a name (e.g.,
x) and gives it a value (e.g., 1). We’ll see a much more
complete picture of the basic operations in Python next time.
These examples also highlight a key feature of Python: variables are strong- and dynamically-typed. A strong-typed language means that values have a fixed type until that type is changed explicitly. A dynamically-typed language means that variables can be assigned values of different types without restriction. Contrarily, static-typed languages require that variables be assigned a single, fixed type that is used throughout the variable’s scope. Don’t worry: we’ll explore in more detail what scope means later on in the course.
On Naming Variables
Finally, variable names are subject to a few rules:
- The first character must be a letter (
a-zorA-Z) or an underscore (_), but letters are preferred. - Variable names cannot have spaces.
- Variable names can include numbers (
0-9) anywhere in the name except the first character (e.g.,abc123is an acceptable name but99redballoonsis not.) - Variable names cannot be keywords from the Python language. These
include the names
for,if, and some others that you’ll see in the next reading.
In general, one should use as descriptive a name as is possible for
variables. For example, if a variable is to represent the mass of an
object, it might be more illustrative to use the name mass than a
single m. However, there are other techniques (e.g., comments) that
can also be used to help a reader of code to understand what each
variable represents. Examples of such techniques will be provided
throughout the readings to follow.
Further Reading
In addition to the various links provided above, skim the Introduction from Object-Oriented Programming in Python.